Indications for working with a left-handed child
The correct position of a left-handed child when drawing or writing.The child, sitting at the school table, has
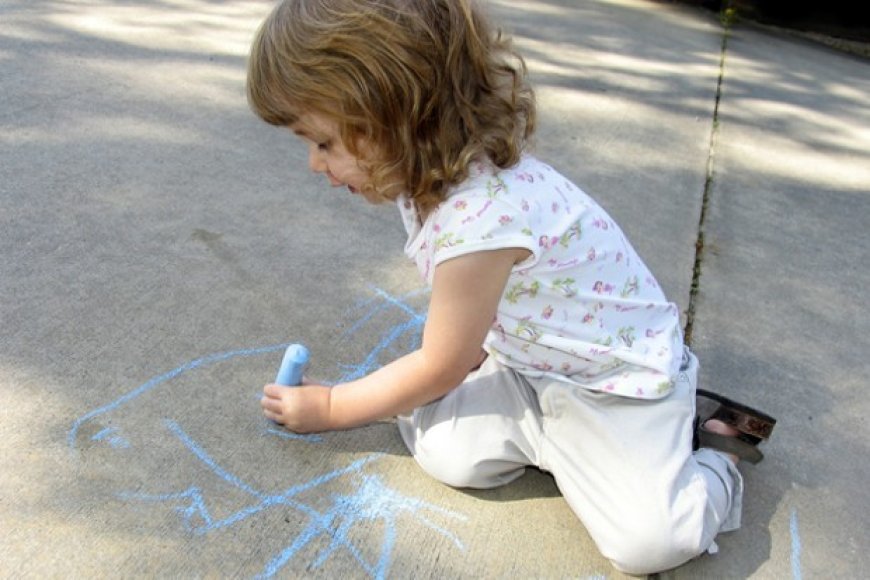
The correct position of a left-handed child when drawing or writing.
- The child, sitting at the school table, has a neighbor on the right side (the left hand must be able to move freely).
- A piece of paper or a notebook is slightly to the left of the child's body axis (when drawing or writing, the left hand approaches from the left to the body axis).
- A sheet of paper or notebook is stacked diagonally. The upper left corner of the paper points upwards (as opposed to being folded by a right-handed person). A child may use a notebook with diagonal lines.
- The child can freely adjust the angle of the notebook. The light should fall from the right side or from above (diffused).
The way you hold a pencil or pen while writing.
- The child should hold a pencil or pen in three fingers: between the thumb and middle finger, pressing the pencil from above with the index finger.
- The other end of the pencil or pen should point towards your left shoulder (i.e., outwards.)
- When writing, your fingers should be below the ruling of the notebook.
Exercises to help you learn the correct grip and the way to hold a pencil or pen:
- Sticking plasticine balls, crushing paper balls.
- Tearing out small papers, blotting paper, plucking threads.
- Crushing, scattering salt, groats, sand on the tray with small finger movements.
- Draw in a horizontal plane: on a piece of paper stretched on the wall or on a blackboard, when the child is standing and his hand hangs freely downwards.
- Drawing in a vertical plane: on the paper stretched on the wall or on the blackboard, when the child stands with his hand raised to the level of the lower part of his face. If the child, despite the exercises, has difficulties with the correct holding of the pencil and pen, it is advisable to use the cap for writing utensils for grip correction.
Exercises to improve the control of the pressure of the child's hand while writing: (Graph motor exercises, speech exercises)
- Painting with finger paint on large sheets of paper, e.g. with a shaving brush.
- Tracing outlines of drawings standing on paper lying on a table or hanging on a wall.
- Performing graphic exercises using various tools: chalk, wax chalk, drawing charcoal.
- Plot large, fluid, free-flowing movements in the form of waves, circles, eights, lines, then figures, letters, etc.
- In the air, with chalk on a blackboard, a brush or charcoal on large sheets, a finger or a stick on trays with loose material (e.g. sand), crayons on sheets.
- Thickening the contours (circumferential tracing) with a brush, crayon, stick.
- Painting large surfaces (cardboard, sheets of gray paper, newspapers) and outline pictures with paint, chalk or charcoal.
- The movements can be vertical or horizontal, but always in the direction from left to right and top to bottom.
Relaxation exercises during breaks during exercise
Graphic:
- Clenching and opening your fists alternately, becoming aware of the state of muscle tension and relaxation.
- Games that mimic movements, e.g. splashing water, shaking off water from your hands, shaking water off the sleeve, shaking off water, shaking a thread from the sleeve.
Must Read: Reflections on a perfectly individualizing lesson
Exercises aimed at shaping motor habits related to the direction of writing (movement automation):
- Drawing lines with respect to the direction: vertical lines - from top to bottom, horizontal lines from left to right.
- Draw circles counterclockwise (similar to writing the letter C).
- Maintain the direction from left to right when drawing lines, writing words.
- Marking a colored margin on the left side in the notebook or in the upper left corner of the page - drawing the sun that shows the way (we start with the sun, i.e. from the left side).
- The use of drawing games and activities that require this direction, Graphic Dictation
Practicing smooth, rhythmic, continuous and pulsating writing movements:
- Outline and outside templates.
- Drawing patterns (with a marker, crayon) in a wider ruling first, then corresponding to the notebook ruling. The next steps are:( 1) tracing the pattern,( 2) completing the pattern, (3) mapping the patterns, (4) drawing the patterns from memory after examining them, (5) drawing various patterns on your own.
- Connecting the designated points with a continuous line - it can be connecting numbers from the smallest to the largest (after connecting, the contour of the planned object, e.g. a house, car).
Movement precision exercises: Exercises to improve the movements of the hands, wrist, hand muscles and fine finger muscles of both hands.
- Drawing in the air, on sand trays, and with various graphic techniques of vertical, horizontal, oblique, broken lines, curves and geometric figures (circle, ellipse, square, triangle).
- Drawing figures, tracing geometric shapes, writing words without taking your hand off the paper
- Paint over or hatch various contours (with horizontal, vertical or diagonal lines always from left to right).
- Filling the contours with a continuous line in the shape of a spiral or glomeruli.
- Copying drawings by tracing paper - tracing the pattern with a pencil, and then painting with crayons within the contour.
- Thickening the outline (small pictures, lines) with a pencil, crayons, felt-tip pens.
- Drawing a dash between two more statutory lines in relation to each other (e.g. wandering in a maze).
It is important to start the exercises with large sweeping movements in the air and above the page, then we move to drawing on large surfaces of paper, and then on tablets and sheets. Line drawing is only the last step in the pre-writing exercises.
Exercising the eye-hand cooperation in the following order:
- Tracing lines, filling dotted lines, circumference of drawings.
- Calculation of drawings by tracing paper or foil, outlining them with templates.
- Painting over contour drawings.
- Hatching the drawing fields with vertical, horizontal, diagonal and wavy lines.
- Filling the drawing with other materials, such as tear-off tissue paper, plasticine or cotton wool.
- Making a frame from patterns.
Manual exercises - help to improve small hand movements: wrist, hand and fingers.
- Threading beads, threading cords or ribbons through holes in objects.
- Picking up small items (e.g. peas, mustard seeds) initially with two fingers, then with tweezers
- Sticking simple shapes from clay, plasticine or modeling clay: balls, rollers, bowls, mushrooms, etc. As you progress, creating more complex forms (e.g. men), requiring different sizes and sticking shapes - first on the basis of models prepared by us, then from your imagination. The last phase is making letters.
- Painting with a finger dipped in paint, and then with a brush or crayon, various circular and spiral forms (circles, balloons, apples, balls, snails, glomeruli, etc.), initially on large-format paper, gradually on a smaller scale. It should be noted that the circular movements of the hand should be counterclockwise, i.e. in the direction of writing many letters (e.g. e, d). Children with weaker manual dexterity can draw a string with a pencil and recommend painting along the traces.
- Tearing and cutting out shapes from tissue paper, colored paper and other materials, as well as tearing and cutting the paper along drawn straight, diagonal, broken and wavy lines.
- Piano simulation: playing the sounds of raindrops with different beats (pouring light rain).
- Kneading balls of paper, tissue paper, cotton wool and sticking pictures out of them (e.g. a snowman made of cotton balls).
- Sewing - piercing the paper with a needle and thread in the places marked by the points.
- Creating various compositions using stamps (we can buy them or make them ourselves, e.g. from potato halves, on which we cut out various shapes).
There are many books available in bookstores to help you develop manual skills, including coloring books, patterns, etc.
Developed for children of all ages, but children with poor hand dexterity should start exercises with the easier ones, intended for a lower age.